Showing posts with label DIY. Show all posts

Thursday, November 28, 2013

Satellite Gear Modding:Adding fans to AZAmerica s900 sat reciever + Ibox

The both of them run really hot, hands into matter, ordered two flat vga fans from aliexpress (THIS).

Az America s900:


Disconnect all equipment from AC !!!!!

Take out the cover, and disconnect the power source, and all other cable attached to work comfortably. Here we go!

 Once opened just locate some pins that can provide some acceptable voltage. See next picture, I found a 5v and ground. (5v will garantee a smooth operation)
 I simply pinched into the cables, before the entered the next connector, and tested. After that, I just simply attached up from the heat sink.

Always test, check, and then re fit all back togheter.


IBOX:

Disconnect all equipment from AC !!!!!
Simple 4 screw on the back of the box. 
Disassemble and you get this, there's the tiny heat sink.

The power jack is ideal, since ibox runs on 12v (check you power source), look at the back of the board, and use one of the holes to pass the cables to the back.
Once tested with which pins does it work, solder and test. Just to keep it on the safe side, you can add some glue-gun in order to isolate.
Once in position, see that the blades does not hit any component on the top board. I used some screws to attached the fan into the top cover.

Put the box together, and ready to go, if the fan is too noisy you can add a 10k potentiometer or a resistance.


Monday, June 17, 2013

ArduGarden (Gardening assited by arduino) Vol II temporal

Few days with a lot of fast protoyping, pardon the cheap materials and the poor finishing.

I added a Small lcd display to see all data.

Yup, I over watered my tomato seeds.

I ended up using a nokia 5100 lcd (thats why the temporal) instead if what I had planned: a lcd 16x2. (glitch: I got only one line out of the two, to work with black boxes showing using the 16x2, and could not fix it right away) Internet suggest its wiring... I triple checked and nothing.

I also own a 16x2 shield, but future plans will include ab outdoor housing and wouldnt want to waste a graphic display on this.

Heres the code: have fun!!

//Coded by Alejandro Zanotti
//Based on the ideas Shown on this post http://forum.arduino.cc/index.php/topic,37975.0.html and this tutorial http://www.botanicalls.com/archived_kits/twitter/
//Version 1.0 
//Date 17 Jun 2013
//lcd start
#define PIN_SCE   7
#define PIN_RESET 6
#define PIN_DC    5
#define PIN_SDIN  4
#define PIN_SCLK  3

#define LCD_C     LOW
#define LCD_D     HIGH

#define LCD_X     84
#define LCD_Y     48

static const byte ASCII[][5] =
{
 {0x00, 0x00, 0x00, 0x00, 0x00} // 20  
,{0x00, 0x00, 0x5f, 0x00, 0x00} // 21 !
,{0x00, 0x07, 0x00, 0x07, 0x00} // 22 "
,{0x14, 0x7f, 0x14, 0x7f, 0x14} // 23 #
,{0x24, 0x2a, 0x7f, 0x2a, 0x12} // 24 $
,{0x23, 0x13, 0x08, 0x64, 0x62} // 25 %
,{0x36, 0x49, 0x55, 0x22, 0x50} // 26 &
,{0x00, 0x05, 0x03, 0x00, 0x00} // 27 '
,{0x00, 0x1c, 0x22, 0x41, 0x00} // 28 (
,{0x00, 0x41, 0x22, 0x1c, 0x00} // 29 )
,{0x14, 0x08, 0x3e, 0x08, 0x14} // 2a *
,{0x08, 0x08, 0x3e, 0x08, 0x08} // 2b +
,{0x00, 0x50, 0x30, 0x00, 0x00} // 2c ,
,{0x08, 0x08, 0x08, 0x08, 0x08} // 2d -
,{0x00, 0x60, 0x60, 0x00, 0x00} // 2e .
,{0x20, 0x10, 0x08, 0x04, 0x02} // 2f /
,{0x3e, 0x51, 0x49, 0x45, 0x3e} // 30 0
,{0x00, 0x42, 0x7f, 0x40, 0x00} // 31 1
,{0x42, 0x61, 0x51, 0x49, 0x46} // 32 2
,{0x21, 0x41, 0x45, 0x4b, 0x31} // 33 3
,{0x18, 0x14, 0x12, 0x7f, 0x10} // 34 4
,{0x27, 0x45, 0x45, 0x45, 0x39} // 35 5
,{0x3c, 0x4a, 0x49, 0x49, 0x30} // 36 6
,{0x01, 0x71, 0x09, 0x05, 0x03} // 37 7
,{0x36, 0x49, 0x49, 0x49, 0x36} // 38 8
,{0x06, 0x49, 0x49, 0x29, 0x1e} // 39 9
,{0x00, 0x36, 0x36, 0x00, 0x00} // 3a :
,{0x00, 0x56, 0x36, 0x00, 0x00} // 3b ;
,{0x08, 0x14, 0x22, 0x41, 0x00} // 3c <
,{0x14, 0x14, 0x14, 0x14, 0x14} // 3d =
,{0x00, 0x41, 0x22, 0x14, 0x08} // 3e >
,{0x02, 0x01, 0x51, 0x09, 0x06} // 3f ?
,{0x32, 0x49, 0x79, 0x41, 0x3e} // 40 @
,{0x7e, 0x11, 0x11, 0x11, 0x7e} // 41 A
,{0x7f, 0x49, 0x49, 0x49, 0x36} // 42 B
,{0x3e, 0x41, 0x41, 0x41, 0x22} // 43 C
,{0x7f, 0x41, 0x41, 0x22, 0x1c} // 44 D
,{0x7f, 0x49, 0x49, 0x49, 0x41} // 45 E
,{0x7f, 0x09, 0x09, 0x09, 0x01} // 46 F
,{0x3e, 0x41, 0x49, 0x49, 0x7a} // 47 G
,{0x7f, 0x08, 0x08, 0x08, 0x7f} // 48 H
,{0x00, 0x41, 0x7f, 0x41, 0x00} // 49 I
,{0x20, 0x40, 0x41, 0x3f, 0x01} // 4a J
,{0x7f, 0x08, 0x14, 0x22, 0x41} // 4b K
,{0x7f, 0x40, 0x40, 0x40, 0x40} // 4c L
,{0x7f, 0x02, 0x0c, 0x02, 0x7f} // 4d M
,{0x7f, 0x04, 0x08, 0x10, 0x7f} // 4e N
,{0x3e, 0x41, 0x41, 0x41, 0x3e} // 4f O
,{0x7f, 0x09, 0x09, 0x09, 0x06} // 50 P
,{0x3e, 0x41, 0x51, 0x21, 0x5e} // 51 Q
,{0x7f, 0x09, 0x19, 0x29, 0x46} // 52 R
,{0x46, 0x49, 0x49, 0x49, 0x31} // 53 S
,{0x01, 0x01, 0x7f, 0x01, 0x01} // 54 T
,{0x3f, 0x40, 0x40, 0x40, 0x3f} // 55 U
,{0x1f, 0x20, 0x40, 0x20, 0x1f} // 56 V
,{0x3f, 0x40, 0x38, 0x40, 0x3f} // 57 W
,{0x63, 0x14, 0x08, 0x14, 0x63} // 58 X
,{0x07, 0x08, 0x70, 0x08, 0x07} // 59 Y
,{0x61, 0x51, 0x49, 0x45, 0x43} // 5a Z
,{0x00, 0x7f, 0x41, 0x41, 0x00} // 5b [
,{0x02, 0x04, 0x08, 0x10, 0x20} // 5c ¥
,{0x00, 0x41, 0x41, 0x7f, 0x00} // 5d ]
,{0x04, 0x02, 0x01, 0x02, 0x04} // 5e ^
,{0x40, 0x40, 0x40, 0x40, 0x40} // 5f _
,{0x00, 0x01, 0x02, 0x04, 0x00} // 60 `
,{0x20, 0x54, 0x54, 0x54, 0x78} // 61 a
,{0x7f, 0x48, 0x44, 0x44, 0x38} // 62 b
,{0x38, 0x44, 0x44, 0x44, 0x20} // 63 c
,{0x38, 0x44, 0x44, 0x48, 0x7f} // 64 d
,{0x38, 0x54, 0x54, 0x54, 0x18} // 65 e
,{0x08, 0x7e, 0x09, 0x01, 0x02} // 66 f
,{0x0c, 0x52, 0x52, 0x52, 0x3e} // 67 g
,{0x7f, 0x08, 0x04, 0x04, 0x78} // 68 h
,{0x00, 0x44, 0x7d, 0x40, 0x00} // 69 i
,{0x20, 0x40, 0x44, 0x3d, 0x00} // 6a j 
,{0x7f, 0x10, 0x28, 0x44, 0x00} // 6b k
,{0x00, 0x41, 0x7f, 0x40, 0x00} // 6c l
,{0x7c, 0x04, 0x18, 0x04, 0x78} // 6d m
,{0x7c, 0x08, 0x04, 0x04, 0x78} // 6e n
,{0x38, 0x44, 0x44, 0x44, 0x38} // 6f o
,{0x7c, 0x14, 0x14, 0x14, 0x08} // 70 p
,{0x08, 0x14, 0x14, 0x18, 0x7c} // 71 q
,{0x7c, 0x08, 0x04, 0x04, 0x08} // 72 r
,{0x48, 0x54, 0x54, 0x54, 0x20} // 73 s
,{0x04, 0x3f, 0x44, 0x40, 0x20} // 74 t
,{0x3c, 0x40, 0x40, 0x20, 0x7c} // 75 u
,{0x1c, 0x20, 0x40, 0x20, 0x1c} // 76 v
,{0x3c, 0x40, 0x30, 0x40, 0x3c} // 77 w
,{0x44, 0x28, 0x10, 0x28, 0x44} // 78 x
,{0x0c, 0x50, 0x50, 0x50, 0x3c} // 79 y
,{0x44, 0x64, 0x54, 0x4c, 0x44} // 7a z
,{0x00, 0x08, 0x36, 0x41, 0x00} // 7b {
,{0x00, 0x00, 0x7f, 0x00, 0x00} // 7c |
,{0x00, 0x41, 0x36, 0x08, 0x00} // 7d }
,{0x10, 0x08, 0x08, 0x10, 0x08} // 7e ←
,{0x78, 0x46, 0x41, 0x46, 0x78} // 7f →
};

void LcdCharacter(char character)
{
  LcdWrite(LCD_D, 0x00);
  for (int index = 0; index < 5; index++)
  {
    LcdWrite(LCD_D, ASCII[character - 0x20][index]);
  }
  LcdWrite(LCD_D, 0x00);
}

void LcdClear(void)
{
  for (int index = 0; index < LCD_X * LCD_Y / 8; index++)
  {
    LcdWrite(LCD_D, 0x00);
  }
}

void LcdInitialise(void)
{
  pinMode(PIN_SCE, OUTPUT);
  pinMode(PIN_RESET, OUTPUT);
  pinMode(PIN_DC, OUTPUT);
  pinMode(PIN_SDIN, OUTPUT);
  pinMode(PIN_SCLK, OUTPUT);
  digitalWrite(PIN_RESET, LOW);
  digitalWrite(PIN_RESET, HIGH);
  LcdWrite(LCD_C, 0x21 );  // LCD Extended Commands.
  LcdWrite(LCD_C, 0xB1 );  // Set LCD Vop (Contrast). 
  LcdWrite(LCD_C, 0x04 );  // Set Temp coefficent. //0x04
  LcdWrite(LCD_C, 0x14 );  // LCD bias mode 1:48. //0x13
  LcdWrite(LCD_C, 0x0C );  // LCD in normal mode.
  LcdWrite(LCD_C, 0x20 );
  LcdWrite(LCD_C, 0x0C );
}

void LcdString(char *characters)
{
  while (*characters)
  {
    LcdCharacter(*characters++);
  }
}

void LcdWrite(byte dc, byte data)
{
  digitalWrite(PIN_DC, dc);
  digitalWrite(PIN_SCE, LOW);
  shiftOut(PIN_SDIN, PIN_SCLK, MSBFIRST, data);
  digitalWrite(PIN_SCE, HIGH);
}
//lcd fin

const int sensorpin=0;
int moisture=0;
int lastWaterVal=0;
int led = 8;

#define MOIST 450 // minimum level of satisfactory moisture
#define DRY 350  // maximum level of tolerable dryness
#define SOAKED 600 // minimum desired level after watering
#define WATERING_CRITERIA 100 // minimum change in value that indicates watering


void setup (){
  pinMode(led, OUTPUT); 
  Serial.begin(115200);
  Serial.println("Soil Moisture Module v1: Loaded");
  Serial.println();
  LcdInitialise();
  LcdClear();
  LcdString("Soil Moisture Module v1: Loaded");

  
}

void loop (){
  moisture=analogRead(sensorpin);

    LcdInitialise();
        LcdClear();

      if (moisture >= SOAKED  &&  lastWaterVal < MOIST) {
        Serial.println(moisture);
       // LcdString(moisture);
        digitalWrite(led, LOW);
        Serial.println("Thank you for watering me!");
        LcdString("Thank you for watering me! :D");  
      }
      else if  (moisture >= SOAKED  &&  lastWaterVal >= MOIST ) {
        Serial.println(moisture);
      //  LcdString(moisture);
        digitalWrite(led, HIGH);
        delay (800);
        digitalWrite(led, LOW);
        Serial.println("You over watered me");

        LcdString("You over watered me :(");
      }
      else if  (moisture < SOAKED  &&  lastWaterVal < MOIST ) {
        Serial.println(moisture);
       // LcdString(moisture);
        digitalWrite(led, HIGH); 
        Serial.println("You didn't water me enough");

        LcdString("You didn't water me enough");   
      }
     
    lastWaterVal = moisture; // record the watering reading for comparison next time this function is called

  delay (5000);
}


Wednesday, June 5, 2013

Wooden Guitar case for an SG Guitar.


I needed a hard box for moving my guitar to gigs.


INFORMATION ON THIS WEBSITE IS PROVIDED "AS IS" WITHOUT WARRANTY OF ANY KIND, EITHER EXPRESS OR IMPLIED, INCLUDING, BUT NOT LIMITED TO, THE IMPLIED WARRANTIES OF MERCHANTABILITY, FITNESS FOR A PARTICULAR PURPOSE, OR  NON-INFRINGEMENT. WE DO NOT WARRANT THAT SERVICE WILL BE  UNINTERRUPTED OR ERROR-FREE. SOME JURISDICTIONS DO NOT ALLOW THE EXCLUSION OF IMPLIED WARRANTIES, SO THE ABOVE EXCLUSION MAY NOT APPLY TO YOU.
Information on this website may contain technical inaccuracies or typographical errors. Information may be changed or updated without notice. Please take care when operating tools.


There´s not much science, you just need the following:
  • MDF wood (or any of your choice)
  • Ethylene-vinyl acetate rubber.
  • Glue, nails, screws.
  • Hinges x 2.
  • Few tools: screwdrivers, hammers, scissors, drill, bits and must be forgetting some.
  • Sinthetyc leather (for covering the outside)
  • Soft cloth for the inside.
  • Board of high density foam.
I wont state how much do you need of each since, I made mine sometime with scrapts, and the size of each guitar may vary.

Also, after I finished I realized I used a really thick (and heavy) wood: MDF 7mm for the side and 5mm for the top and bottom cover, if I just use more light wood it would be fine and it would be lighter and easier to carry it.

So start measuring your guitar:
With the basic measurements:

1. Build the the two sides of the box.


I did the bottom one, a bit higher than the top cover, so the guitar can fit perfect and it can close with out any problems.
I basically glue the wood and then used nails/screws to make it resistant.
-Top cover, do it as the same but with a bit less height.

2. Guitar shape

With the foam place your guitar on hit, and draw the shape of it. I used high density foam, simple beacuse I had it and it breaks less than the regular. To cut it, you can use a small saw, a cutter, I used an old guitar string attached to a power source until it got red hot so I can do clean cuts.
You end up with something like this:
I did mine, a bit bigger than the guitar I can wrap it with a soft cloth late. Take that into account.
This is how it fits, please do the square part to fit the size of your box.
 

3. Stands for the neck

With more wood I did two stands to fit the neck on it. Please measure measure and double measure everything-take the size of the neck for the stands, and measure how high your guitar will end up.
 

4. Set all the parts, and check how the guitar fits.

With a drilling tool, I added the hinges and the top cover:
 
I also did a cover on the bottom side, with Ethylene-vinyl acetate rubber. So the guitar doesnt sit on plain wood even though I used a cloth.

5. Upholstery

I was (am) a tottal noob when it comes to do this kinds upholstery. I use black synthetic leather.
I started with both sides of the case separately. I did the leather first and the soft fabrics later.
I used a contact glue and a stapler to get the fabric.
I had problem with poor measurement and low experience with upholstery. Be sure to use a glue that is compatible with foam, otherwise it will melt it and all your effort will be wasted.
 
Also look out and for tricky parts, I´d rather use small parts of cloth later.


6. Finishing touches

At this point guitar fits perfect, all the upholstery is done.
At this point I installed the hinges, the closing hooks.
Optional but useful: Add a handle to carry it around and wire/small chains to secure the top part dont fall when you open it.


Friday, May 24, 2013

(How to) Wifi Dish Antenna (part I)


Ever wanted to build a wifi antenna out of a satellite dish antenna?

It all started with a donation of this dish, old, forgotten and rusty.

I teared all apart, sanded and grinded all rust away.

Bought this spray can:

This is the result after painting:


This is the antenna link I am basing my idea. Also look at this links:
Really cool explained
Perfect Explanation of biquad

Simple arduino+breadboard idea

PSince I am startin to experiment with arduino and I breadboards are a must: 

Here a basic idea using:
•one cd case
•screw supports from a motherboard

A simple cd case, just need half of it.
I sticked the breadboard and the 4 four screw supports from an old motherboard.

All mounted ready to experiment.

Monday, May 20, 2013

How to Refurbish an original gameboy


Gameboy original
My old gameboy, the jewel I dreamed of as a kid. And finally, I bought this 2nd hand gameboy, and really used it ... after all the commercials I've seen, I got mine..
Time passed (this one is dated 1989), so it needed a refurbish. I read a lot about restoring. Here the steps:

1. Disassemble the GB


This is the worst part. Taking apart a gameboy, has its tricks, the greater are the triwing screws. The simple way is to get a screwdriver triwing (http://dx.com/p/large-triwing-trigram-screw-driver-6154), but there are two options:

Alternative A)Use a flash scredriver:


Alternative B) Make a triwing out of a pen:


Tried both, ended with using a flat screwdriver
My attemps


The disaster I made

I used bothe screwdrivers, one for getting the screw out (the first and hardest part) the other just to take it out.
The are 6 screws on the back of the case:
With patience and the links from above, you can figure out how to do this. The insides screws are cross, so no problem there.

2.Open Gameboy

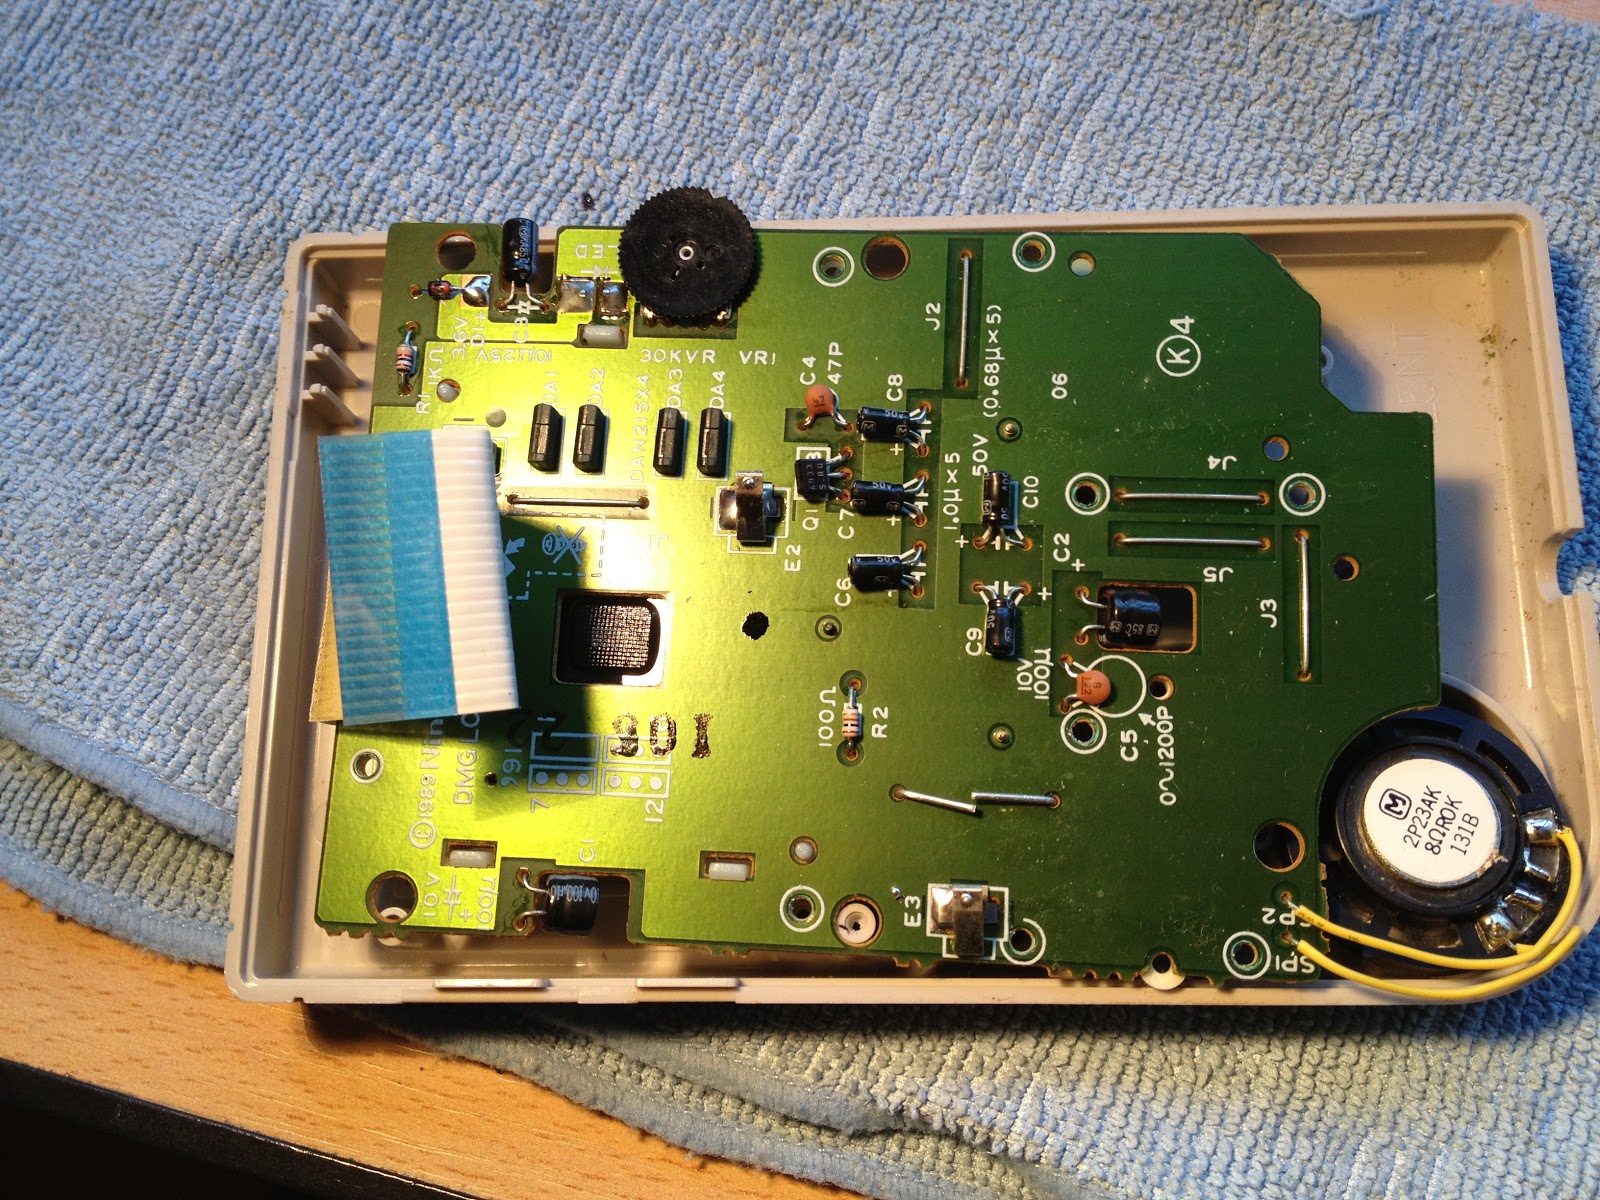
Once open , need to separate de LCD ribbon, you will end up with this two sides:
Front 
Back
After son screws: simple, start collecting plastics, to do the washing.

3. Washing

Get all the parts, and soak them into hot water with regular soap. Use a brush.
Before front

Before back.


4. Sulfated battery connectors 

Simply use water and soap. If any remains use a nail file to take the rest out.

5. Replacing parts

Most old GBs have some damage parts, mine only had the LCD screen cover, founded at amazon. http://www.amazon.com/gp/product/B002J9R2LA/ref=oh_details_o01_s00_i01?ie=UTF8&psc=1 other GBs have other parts to replace, see links below.

6. Re-assembly

Put all the parts together now.

More link to view: